Zero/Span Calibration
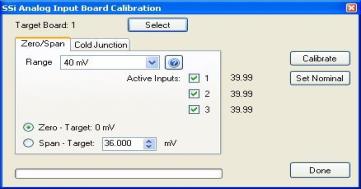
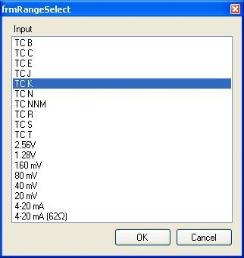
The first step in the calibration process is the zero and span calibration. To select a board to calibrate, click on the Select button. This will display a drop-down list that the user can select the board to calibrate. This list will only display the available boards to calibrate. Once a board is selected, the current values will be displayed along the right of the tab box. Select the input range from the drop-down list. To perform a zero calibration, select the “Zero” option. To perform a span calibration, select the “Span” option. The target value for a zero calibration is 0 millivolts. The target value for a span calibration is roughly ninety percent of the range millivolts. The target value is displayed in the box and can be modified, if desired. If the millivolt range is not known, the user can click on the help button next to the range drop-down list. This will display a list of inputs. Selecting the correct input will set the correct millivolt range.

Checking the check box next to the corresponding input will determine if that input will be included in the calibration.
|
NOTE: If the user is using a 10:1 jumper, the user will need to multiply the source signal by 10 to get the correct span value. For example, if the 10:1 jumper is set on a 1.25V range, the suggested source signal will read 1000 mV. The supplied signal will need to be 10000 mV to account for the 10:1 jumper. For a zero calibration, a value of 0 mV will need to be sourced to the input or inputs. For a span calibration, a value of 90 % of the full range will need to be sourced to the input or inputs. Press the Calibrate button to begin the calibration process. Press the Set Nominal button to apply nominal values to the inputs. |
|
